Geek Gifts – Morse Code Mug Rug Tutorial

My wonderful, techno-geek man and I have been together for twenty years. We don’t give each other big gifts, but I decided to make him a mug rug for his desk, as he often has his coffee and a sandwich or a snack while he’s working at the computer, or the radio, or reading (on an iPad, of course,)

G’s been absorbed in all things technical since he was a lad; and before there were computers and programming code there were radios and Morse Code. He’s used Morse off and on for more than 40 years. So, what better pattern for a mug rug for him?

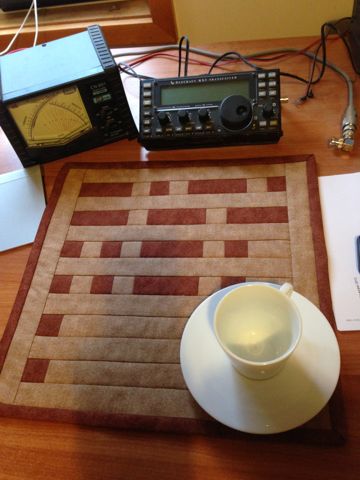
Quilted Morse Code mug rug

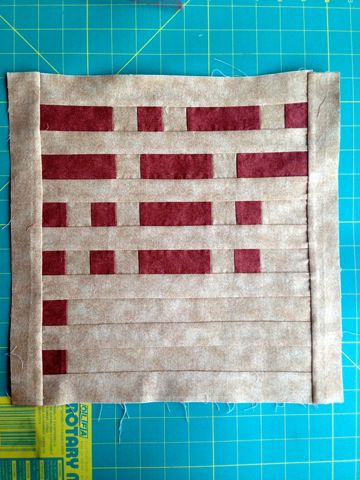
Each row of dots and dashes represents 1 letter in Morse Code; the six rows, starting from the top, read ‘coffee’ – it only took him a moment to realise it was Morse, and to read it!

If you’d like to make one for any of the geeks you love (or for your own inner geek!), here’s a step-by-step tutorial. Note that this is my first quilting tutorial, so I hope I’ve made it easy enough to follow! I’m assuming that you have some patchwork and quilting experience, so am not giving detailed instructions for standard steps like backing and quilting.


Finished size:

13.5 inches square (it’s a fairly large mug rug!)

Materials:

  • For top – 2 fat quarters, one light and one dark (I used two contrasting shades of brown, to complement the woodwork in DH’s study)
  • For backing – 16” x 16” piece of fabric
  • Batting – 15” x 15”

Cutting:

From dark fat quarter:

1 – 10.5” x 3.5” – then cut one piece 1.5” x 3.5” off this piece and hold to one side

2 – 1.5” x 7.5” – then cut one of these strips into 5 x 1.5” squares

3 – 2.5” x WOFQ – for binding

From light fat quarter:

First, cut 11 – 1.5” x WOFQ strips; then cut these as follows:

  •             2 – 13” lengths (side borders)
  •             7 – 11” lengths (sashing and top and bottom borders)
  •             1 – 10.5” length + 9” length
  •             1 – 10.5” length + 7.5” length

From the leftover strip ends, cut 2 2.5” x 1.5” lengths and 5 1.5” x 1.5” squares

(Note: if you are not using a fat quarter, and instead using a wider or full-width fabric, you will be able to cut fewer strips to get these lengths.)

Sewing

Steps 1 & 2

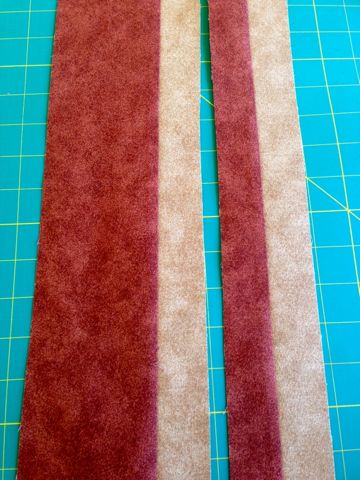
Sew the 3.5” x 9” dark strip to a 1.5” x 9” light strip, long sides together. Press seam.

Sew the 1.5” x 7.5” dark strip  to the 1.5” x 7.5”, long sides together. Press seam.

Your fabric strips will look like this – except shorter (I was trying to make 2 mug rugs at once!)

Fabric strips sewn together


Step 3

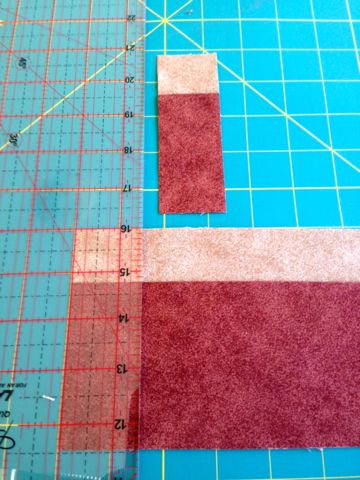
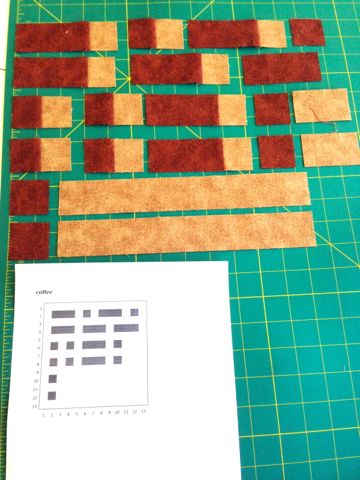
Measuring carefully, cut the wide strip into six 4.5” x 1.5” pieces. These will become the dashes.

Cutting wide strips

Step 4

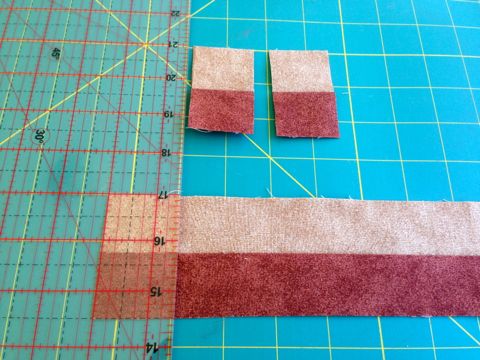
Cut the narrow two-coloured strip into five 2.5” x 1.5” pieces. These will become the dots.

Mug rug cutting strips

 Step 5

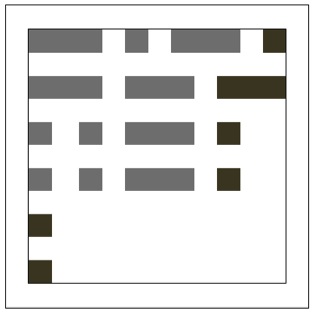
Using the below diagram as a guide, lay out the pieces for each row. Note that in the diagram, the darker colour dash and dots indicate the ones that don’t have a light square attached. For the dots and dashes with light squares attached, the light square should always be to the right of the dark square.

Morse Code Mug Rug diagram

On the 3rd and 4th rows, add in the 2.5” light spacer strips at the end of the row; on the 5th and 6th rows, add in the 10.5” spacer strips to complete the rows.

20131127MugRugTutorial4

Now, do check and double check that you have all the pieces in the correct order!

Step 6

Sew the dots, dashes and spacers of each row together, making sure to keep the correct order. Press the seams.

Step 7

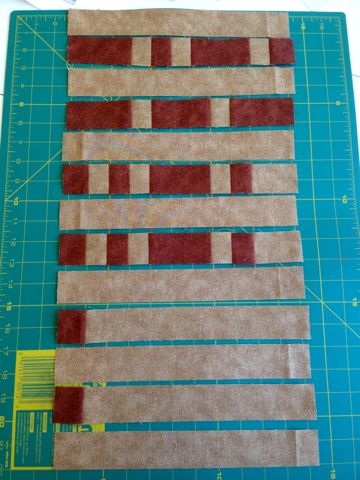
Now, lay out the rows of dots and dashes with the sashing strips between them:

Mug Rug tutorial: Completed strips in order

(They’re in the correct order, aren’t they, because you’ve checked, right?)

Step 8

Now, keeping the order correct, sew each letter row of dots and dashes to a row of sashing, then sew them together in order, with the top and bottom borders in place. (I pressed the seams towards the light sashing, because that gave less bulk at the joins of the dots and dashes.)

Step 9

Add the side borders and press your seams, and you have the completed mug rug top:

Completed mug rug top


Step 10

Now you can add your batting, backing and quilt. I used a cotton batting, and quilted it in straight, stitch-in-the-ditch lines along each of the seam lines.

Step 11

Once your quilting is done, press the mug rug again. Then trim off the excess backing and batting. Sew the 3 dark 2.5″ wide strips end-to-end, press them in half lengthwise, and use them to bind the mug rug, in whatever binding method you prefer.

Quilted Morse Code mug rug


Winter

It’s a month since I last posted. I don’t have a lot of textile work to show for that month, but there is some progress.

The aqua quilt is pin basted,and waiting to be machine quilted. It may be waiting a while.

I now have 4 blue and teal star blocks, but that project is on hold for now.

My new shawl design is also on hold, as is the cardigan I’ve been knitting for a while.

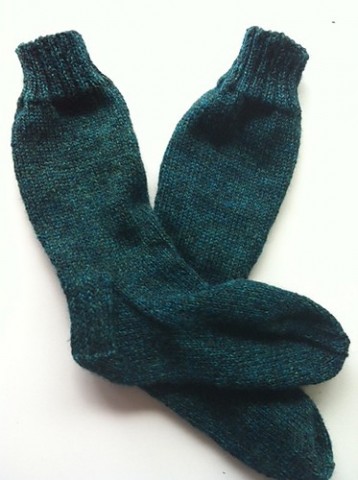
I have finished something – a pair of plain socks. I’m calling them my lumberjack socks, since they’re good boot socks and the greens remind me of pines. The yarn is Cleckheaton Country Tartan 8 ply.

Green boot socks

I knit while I’m writing, and plain socks are best. I’m a slow writer, so I spend a lot of time staring at the screen, searching for the right words. The knitting is a kind of meditation; it helps to shift my brain into a creative mode, and keeps my hands busy so that I don’t go clicking all over the internet. With plain socks, I’m not reciting a pattern in my head and I can drop them the moment words come to me so I can type. I’ve got a lot of writing to do in the next few months; I have two more lots of the Cleckheaton yarn (blue and red), so I see some more socks in my future.

The only other creative project I’ll be working on for the next month or so is a quilt for my nephew’s 18th birthday. It may not get done in time but we’ll see. I had some black and white fabrics, and bought some more on Friday – although it’s pretty hard to find non-floral B&W (not grey) fabrics in our town; I went to the quilt shop, Lincraft, the other fabric shop, and raided Big W’s fat quarters, but there wasn’t a huge choice anywhere.

However, today I’ve selected the ones I’ll use; I’ve made 4 blocks so far, and cut up most of the fabric for the remaining 44 blocks. I will have to get a little extra of 2 of the fabrics but I have enough to go on with for now and will go to the local quilt store during the week. My plan is that when I need a break from writing, I’ll make blocks.

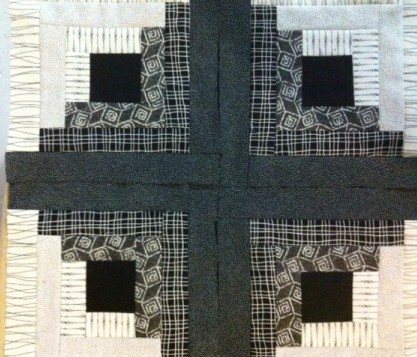
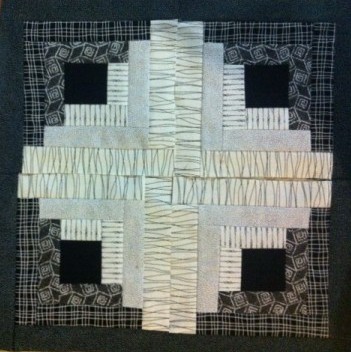
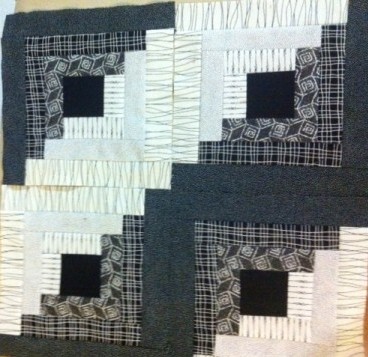
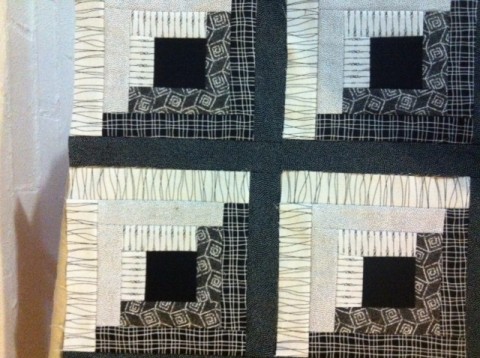
My nephew plans to be an architect – so what better structure to use than log cabin 🙂 I haven’t decided how I’ll put the blocks together yet. I’ve been playing with the 4 completed ones to see the different effects – isn’t log cabin such a versatile and magical block – so many possibilities!
Log cabin quilt blocks 1

Log cabin quilt blocks 2

Log cabin quilt blocks 3

Log cabin quilt blocks 4

New Year, new look

While I planned to post something today – a catch-up post – I didn’t actually plan to give the blog a whole new look. But you know how it goes… the theme I was using needed updating, and so I did the auto-update, and as a result it went all wrong. I could have stuffed around and fixed it (the problem was the widgets, I think), but I’d been planning to do a new theme, and I now have a great little program called Artisteer, so I played around on that and voila! – we have a new design!

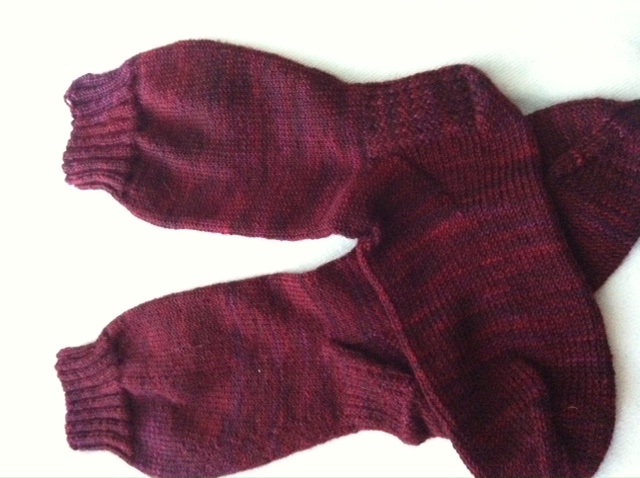
So, what have I been up to since last I posted? Not a lot in the way of knitting and crafting, as I’ve been flat out teaching, marking, finishing a book and revising it. I have a number of wips languishing or receiving only occasional attention – two top-down cardigans, a lace shawl, some mittens for Gordon. But I did finish some red socks for my sister for Christmas:
Handknitted red socks

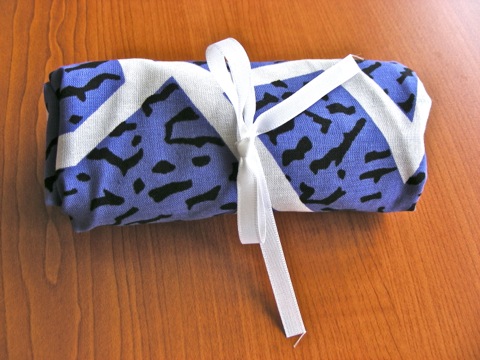
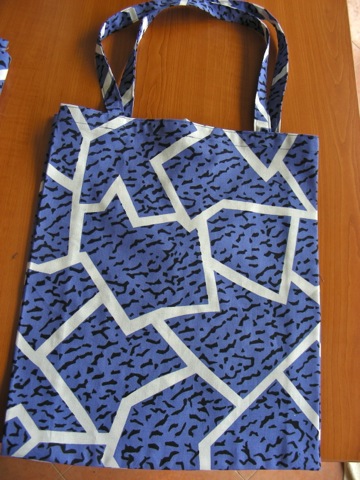
There was also a little Christmas sewing – a roll-up shopping bag for a batty friend who likes bats – the print isn’t really bats, but it looks a little like them so we call it bat camouflage:
Roll-up shopping bag

Shopping bag

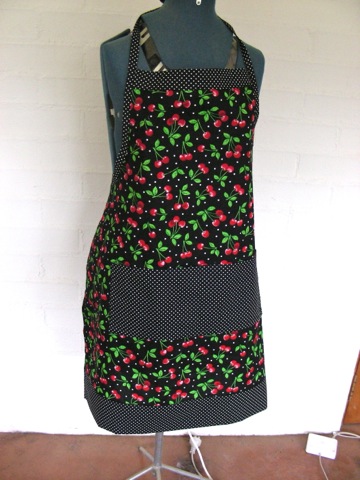
I was in a secret santa swap with the local Ravelry crew, and I made an apron for my cheesecake-baker extraordinaire friend, Amanda:
Handsewn apron

They’re not made from yarn or fabric, but I’ve also made quite a lot of these in the past few weeks:
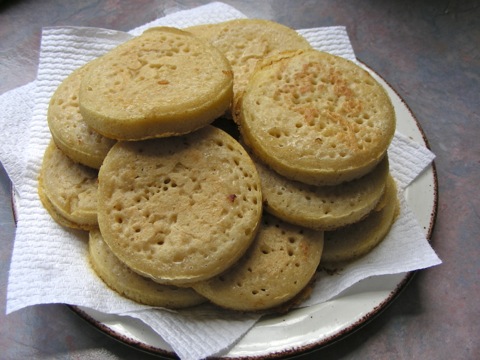
Sourdough crumpets
Sourdough crumpets – delicious toasted and spread with a little butter and honey! I stocked up my parents’ freezer while I was in Canberra for Christmas, and restocked ours yesterday.

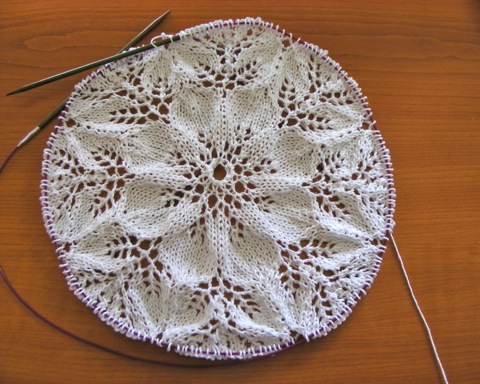
Knitting-wise, I’m currently working on a lace doily:
Knitted lace doily in progress

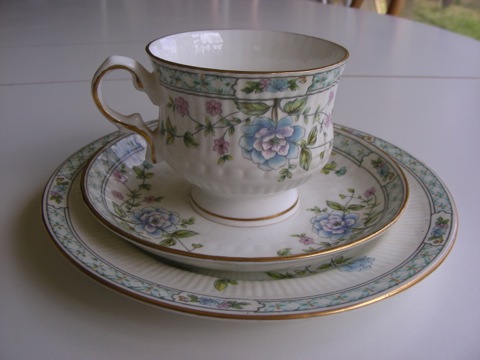
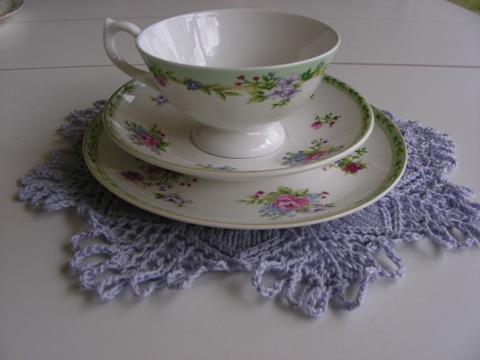
…because I need some lace doilies for the lovely china teacup sets my sister gave me for Christmas:
Hitkari tea setting

Ashdene Kensignton tea setting

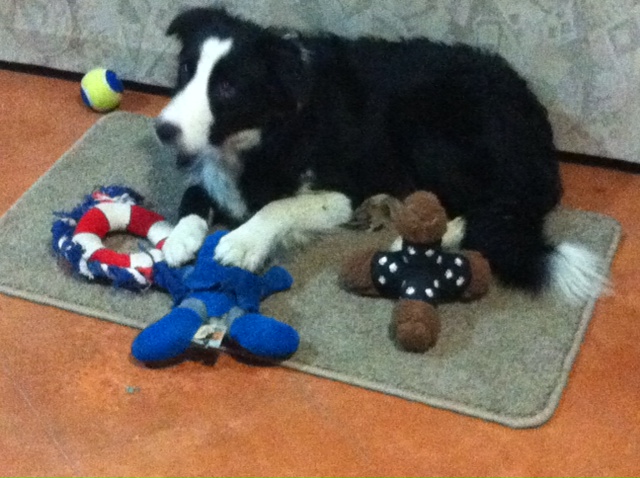
And the last thing I should mention is that we have a new puppy – 9 month old Skye, who joined our household two months ago, after we had to euthanise our beautiful, beloved Princess Dog. Skye loves toys…
Skye with her toys

… and is a fibre enthusiast…
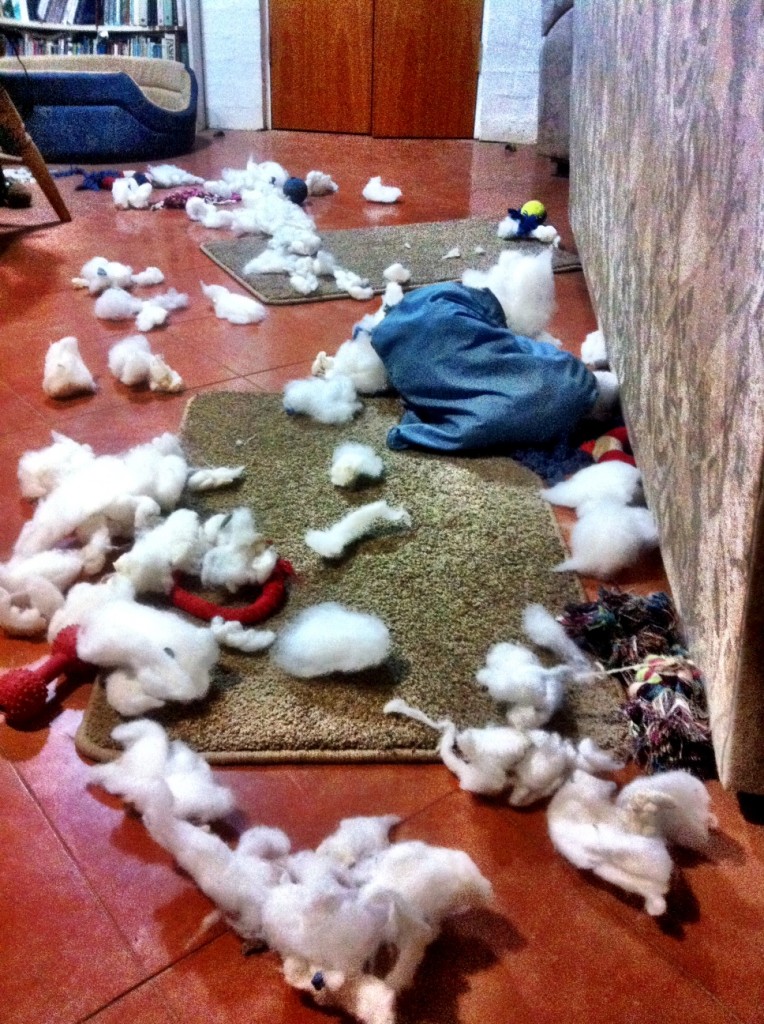
stuffing from a cushion pulled out by puppy!
She especially loves the fluffy stuff inside her cushion, and often pulls it all out – it’s one of her favourite games!

So, that’s my catch-up post for this last day of 2011. I hope you like the new blog design – I do! I’m hoping that 2012 is a great year for all my friends – may there be much making of beautiful, practical things, for all of us, and companionship in the making and sharing 🙂


Plain socks

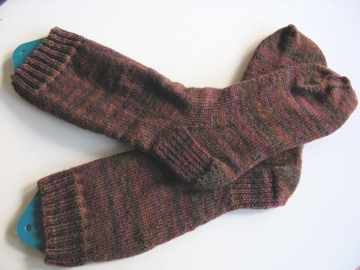
Handknitted socks

They’re not fancy. There’s no lace, or cables, or other decorative stitches, just simple rib and stocking stitch teamed with a subtly striped yarn. I have another pair like this, in greens, and I love them as much as my fancier socks. The yarn is Trekking XXL, a good hard-wearing yarn with colour schemes that blend into each other. The pattern was a Patons pattern that I have memorised – and possibly adapted – over the years. It works. I added my shaped toe.

Plain socks, perfect socks.

It’s not yarn, but….

…it is delicious!

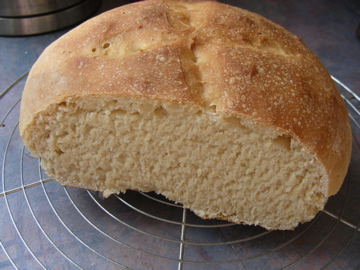
I decided to try my hand at baking sour dough bread. This is my first loaf, baked this morning:
Sour dough bread

I loosely followed the instructions at sourdoughbaker.com.au and also at this site for making the starter from scratch and baking the bread. Having taste-tested a couple of slices already, I’m very keen to make more!

Flood Relief Appeal Update

I’ve sold more patterns in the past few days than usual, presumably because people are wanting to support the Flood Relief Appeal. As I don’t wish to profit from people’s desire to help those suffering, I’ve decided to increase my donation from 50% of pattern sales to all profits from January pattern sales – i.e. the sale price less Paypal and Rav fees.

So, there’s already over $60 raised. Thank you, all!

Queensland floods fundraising

Like most Australians, I’ve been watching in dismay for the past couple of weeks as heavy rainfall across the state of Queensland has produced wide-spread flooding. The flooding has affected both the coastal side of the Great Dividing Range, and the western, inland parts of the state. The latter floodwaters are moving slowly through the inland river system and inundating vast tracts of agricultural land and many small communities, washing away roads and railway lines,  filling coal mines, drowning homes, equipment, livestock, crops, and wildlife. The coastal floods, pouring down the steep escarpment of the east side of the Great Dividing Range, have often moved more quickly, swamping larger coastal communities. This week we’ve seen the huge tragedy and loss of life from flash flooding in Toowoomba and the Lockyer Valley, and that wall of water making its way down to flood large areas of Ipswich and the state capital, Brisbane.

The north of my state, New South Wales, has also been affected, and a number of towns are still under threat of flooding. I live right on top of the range, and am in no danger, especially as our rainfall, although higher than usual, is nowhere near the deluge levels being experienced further north.

Because of the scale of the disaster – an area the size of France and Germany combined has been affected – the cost to individuals, families and small businesses will be huge.

I hate feeling helpless, and am not able to do much. However, one thing I can do is to donate 50% of all my pattern sales for the month of January to the Queensland Premier’s Flood Relief Appeal. So, if you’ve been thinking about purchasing either of my patterns, for this month (at least) half of what you pay will go to flood relief. I’ll give a tally part-way through the month, and in early February.

The patterns are currently only available through Ravelry, but you don’t have to be a member to purchase them.

To purchase the Christmas Lights Shawl, click here.
To purchase the Brangian Shawl, click here.

Some other designers are also donating, and when I have a list of them I’ll post it on the blog.


Monkeys in the pool

Before I went into hospital, I called into the new yarn shop The Granny Square, a very convenient couple of blocks from the hospital. I decided I deserved a little bit of spoiling, so I bought two balls of Morris Empire yarn for socks – picking a variegated yarn, just for a change.

I didn’t get to cast on the socks until after the surgery. I decided to knit the No-Purl version of Cookie A’s Monkey Socks from Knitty.com, which I have knitted before. Last time, I started them on 3mm needles, as Cookie’s legs are clearly much skinnier than mine. However, I didn’t have 3mm needles with me in Sydney, so I started with 2.75mm, hoping they’d be okay. I got almost as far as the ankle, and tried them on… nope, I definitely need the bigger needle size. So, yesterday I cast on with the second ball of yarn using 3mm needles.

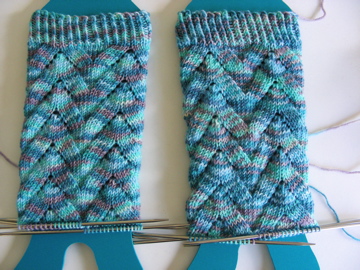
It’s been interesting watching how the variegation in the yarn knits up and pools with the different gauges. Here’s the two socks:

The tighter gauge (2.75mm needles) is on the left, the slightly looser on the right.The pale green shows up more in the first, the blues more in the second. The two balls are from the same dyelot, so it’s probably just the knitting tension creating the differences.

However, I’m quite happy with way the yarn is in the looser tension, so I’ll frog the first one and reknit it after I finish the other sock. I’m up to knitting the heel on it, and I’ll drop down a needle size for the foot. My feet are reasonably slim – it’s my calves that are no longer as graceful as they used to be!

The view from here….

We’re already two days into the new year, and while I’m recovering well from the surgery, I’m taking it easy and enjoying reading others’ blogs about their 2010 achievements, and their plans for 2011.

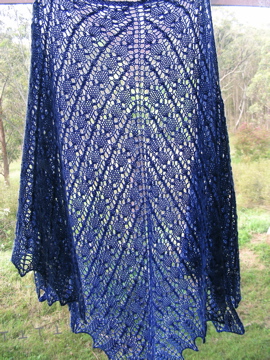
2010 will probably go down for me as the Year of Knitting Shawls. I did complete the 10 Shawls in 2010 Challenge on Ravelry, with my 10th shawl – an All-Lace Brangian – blocked a few days before I had to go to Sydney last month:
Brangian Shawl All-Lace version

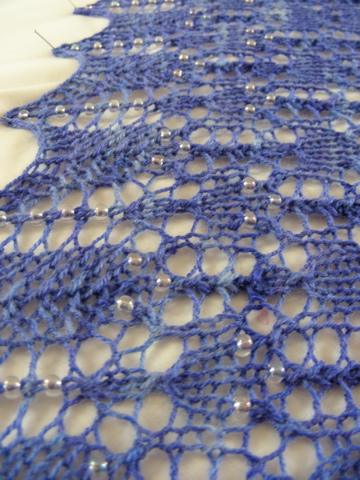
Brangian Shawl bead detail

The yarn is another lovely 50/50 silk/wool from Wooltopia, and I knitted the shawl on 4.5mm needles.

Five days connected to a drip in hospital in Sydney before my surgery gave me the opportunity to finish knitting a couple of Christmas gifts, although I’m sorry I don’t have great photos of them. However, my nephew’s Binary Cable Hat and my niece’s Fingerless Lace Mittens were finished well in time for the family’s Christmas Day celebration. I wasn’t able to go to Canberra to be with them for Christmas, but I was discharged from hospital on Christmas Eve, so Gordon and I were able to enjoy a quiet day together.

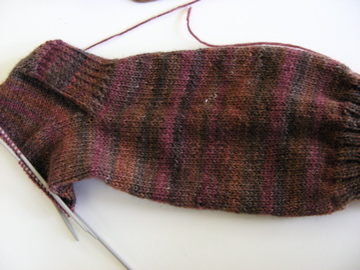
My Sydney and hospital knitting has been socks – a plain pair in Zitron Trekking XXL which I love for out-in-the-bush socks:
Hand knitted sock in progress

Because the brown is a little dark for knitting at night, I’ve also started a pair of No-Purl Monkey Socks in Morris Empire 4ply:

I’m not making resolutions for 2011, but there are certainly some ideas/desires/wishes that I’m contemplating and hoping to put into action in the next 12 months or so:

  • keeping the stash under control – I’m not going to stick to a firm work-from-stash commitment, as my stash isn’t HUGE, but I’d like to be thoughtful in my yarn purchases, and use up some of the yarn that’s been idle for some time;
  • get back into weaving – now that I’ve sold my smaller floor loom, and made the decision to keep the large 12-shaft loom, I’m hoping to use some of my weaving yarn stash to make cloth for garments and for household items, and at the same time stretch my weaving skills a little by experimenting with yarns, more shafts and weave structures
  • yarnosophising – I’d like to take time to think and write more about craft and its important role, which will include reading some texts (such as finishing Soetsu Yanagi’s The Unknown Craftsman) and participating in the Slow Cloth movement, as well as exploring some ideas about feminism, feminine strengths, and craft work.
  • clothing – I’d like to make some more of my own clothing, both from knitted and woven cloth
  • designing – with two successful shawl designs completed in 2010, I’d like to further stretch my design experience in 2011, although I’m not sure yet what shape that will take

I think there’s enough there to keep me busy for twelve months!

Shop clearance – 15% off

I’ve had fun with my little Yarnosophy shop, but with the upcoming surgery I’m going to be offline for a while, and my life priorities will have to shift a little for the foreseeable future. So, I’m closing down the shop on 30 November.

To clear stock, there’s 15% off stitchmarkers and the 2 skeins of yarn still left.

So, hop in before it’s too late!