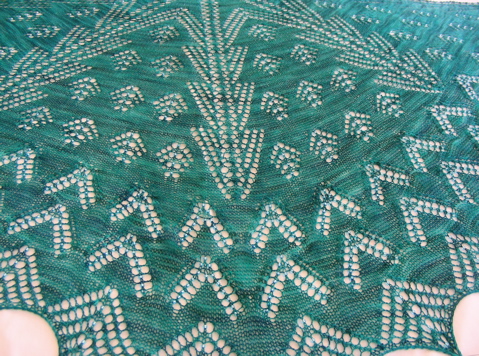
Many lace patterns require blocking as part of their finishing process, to open out the lace pattern to all its beauty. Depending upon the pattern, a shawl can look quite strange when it first comes off the needles – lumpy and bumpy as the increases and decreases of the lace pattern act against each other. Blocking stretches all that out, and makes the lace look the way it should.
Here’s a before and after photo of my green Christmas Lights Shawl:
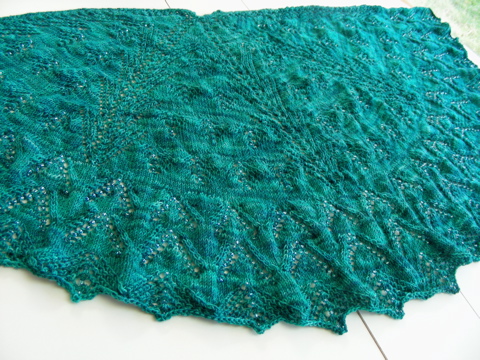
Blocking will hold for a fair while, however, if a shawl is washed, or worn often in a very humid environment, it will likely require re-blocking. The following are some general instructions for blocking shawls.
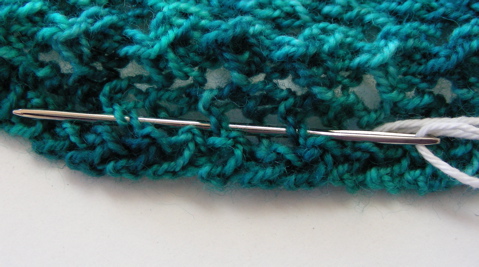
Using a darning needle, thread a long length of smooth, contrasting yarn (or blocking wires) through the holes in the top edge of the shawl. If it’s a triangular shawl, you may also wish to thread a stabilising yarn or wire along each side edge.
Soak your shawl in lukewarm water with a small amount of mild (noncaustic) detergent added. For wool, soak for at least 30 minutes. For silk or silk blends, at least an hour is recommended. Rinse carefully, with as little agitation as possible, and then roll (without rubbing) in a towel to soak up excess water.
Spread a sheet over blocking mats, a bed, or other large, pinnable surface. Carefully lay out the shawl, and gradually stretch to shape. Pin every inch or two along the top edge through the eyelet holes, using the contrasting yarn or blocking wire as a stabiliser.
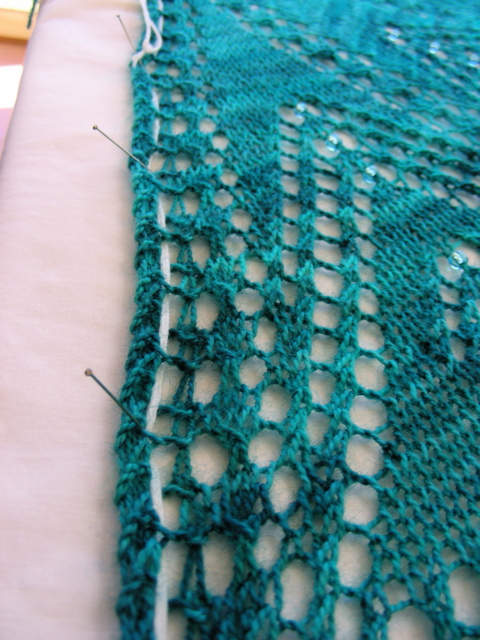
Then pin the along the bottom edge, working from the centre outwards, stretching the shawl out to open up the lace patterns. If the shawl has a picot or other shaped edge, pin out each point.
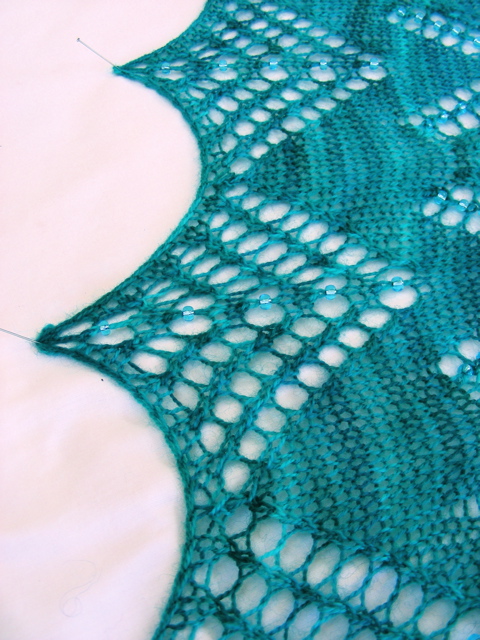
Note that silk is more fragile when wet than wool, so be gentler with it. Use a tape measure to check that the amount of stretch is consistent around the arc of the shawl.
Leave pinned until completely dry, unpin and carefully remove your stabilising yarns or blocking wires, then enjoy your beautiful shawl!

